Showing posts with label step by step. Show all posts

Enjoying The Creative Process & STARRY NIGHT

STARRY NIGHT
Watercolor - 11x15

You hear it all the time - enjoy the process, not the product. But as we all know, that is often easier said than done. I usually love the first stage of watercolor, where everything is possible and the paint flows smooth and easy and the colors are pretty and bright.


In my weekly watercolor class I recently demonstrated painting a night sky. I spattered masking fluid for the stars and used it to save the whites for the snow on the building roofs and trees. Then, I wet the paper and used all shades of blue for the sky and added some shadows in the snow.


When everything was dry, I rewet the foreground and painted the trees with shades of green and phthalo blue.


This is the stage of every painting where I start to get too critical of the 'product' and have to remind myself to trust and enjoy the 'process' of creating. I removed all of the masking fluid and added details to the buildings, more darks on the trees and light shadows on all of the snow.

So, remember to enjoy all of the creative process, the highs and the lows, and to relax and have some fun!


Watercolor Collage Tutorial - Cactus Flowers


I love experimenting by combining watercolor with different mediums and collage is a perfect fit. On 300# watercolor paper I lightly sketched the cactus shapes and where I wanted the flower blooms. Then I wet the paper and painted in some of the colors to give me a starting point for my collage. I then used regular white tissue paper and painted several pieces using the colors I wanted in my composition. When the tissue dries it makes a wonderful and inexpensive collage paper.


Using regular white tissue paper I painted several pieces using the colors I wanted in my composition. When the tissue dries it makes a wonderful and inexpensive collage paper.


I started collaging papers on to the painting, using matte medium for glue. I focused on the cactus flowers using some of the tissue paper that I had painted along with some I found at the store that had fun designs on them papers for the flowers. I wasn't sure I was happy with the design of the cactus and you can see below that I ended up changing it a little bit by making the casts on the bottom left more dominant and in front of the other side.


I glued a dark green tissue paper that was a little heavier and had gold flecks (the mettalic doesn't photograph very well) for the shadow areas. i added more collage papers to the flowers and came in with more watercolor paint around the cactus and blooms for definition.


I continued adding papers, gradually building up texture and using some heavier rice papers. I painted more in the background and on the flowers. Added more collage... and so on until I felt like it was done. Sometimes the hardest part is knowing when to stop! Another cactus and flower watercolor collage using a different color scheme.


Another cactus and flower watercolor collage using a different color scheme. Have you ever tried combining watercolor and other mediums? Feel free to leave a comment, I would love to hear from you.


Roses and Watercolor

ROSES 
 Watercolor - 11x15

Roses can be intimidating to paint because they are such a perfect looking flower. I always begin any floral painting with wet paper, applying the paint quickly and loosely for a soft background.
While the paint is still wet, I begin to use thicker, darker paint with little water to begin defining some of the roses and petals. I let that dry and then come back in on dry paper and start adding definition to the roses and leaves.

DAISY TRIO in Progress

DAISY TRIO
Watercolor - 8x10
SOLD

I began this painting of daisies by lightly sketching in three on 140 lb watercolor paper. I then wet the paper and quickly painted colors around the white flowers using shades of yellow, green and blue.
When everything was dry I began using background colors to negative paint and define the white petals and leaves. I kept building up the definition of the flowers and adding background leaves until I was satisfied with the painting.


Watercolor on Rice Paper - Step by Step

PINK BLOOMS
Watercolor on Rice Paper - 11x15

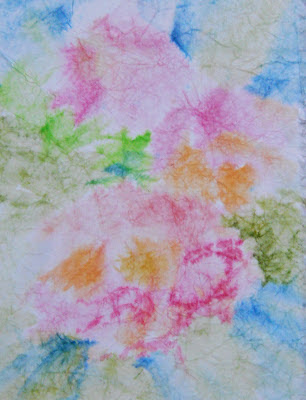
Here are the step by step photos of the demo painting from my recent Watercolor on Rice Paper Workshop.
I used Massa rice paper, soaked it in water, crumpled it and then glued it to 140 lb paper. While it was still wet I painted in the initial washes of color for the flowers, leaves and background, letting the paint settle into the cracks and crevices of the paper creating wonderful texture.
As the paper began to dry I started using negative painting to define the flowers, petals and leaves. The rice paper tends to soak up the paint so I had to keep reinstating the darks.
When everything was totally dry I added more washes,shadows and details to finish up the painting. I love the soft, romantic look that this technique gives to a floral painting!

Breckenridge Batiks In Progress by Colorado Artist Martha Kisling

PASTEL DAISIES
Watercolor Batik - 12x19

Here are all the watercolor batiks I am working on at the Tin Shop in Breckenridge, CO. Once the wax has melted I figure I should take advantage of it and work on several batiks at once. Then I turn off the wax and paint on all of them so they can sit and dry before the next wax application.
I thought I would show the steps I go through with my watercolor batiks. First, I ink in the drawing on rice paper using a thin, waterproof pen. Then I apply the melted wax to anything I want to stay white - just like using masking fluid. Even though the daisy petals are white I wanted a little color on them first so I just spattered a little wax her and there for the whites.
After using watercolor for some shading on the flowers I applied wax to all of the petals to protect them from further applications of paint. The watercolor tends to run outside of the ink lines on the rice paper so to keep a sharp edge you must apply wax. Now that the petals are protected I can paint the leaves right next to the flowers.
I applied wax to the stems and leaves and then painted the entire background. At this point you don't have to be careful, you can paint right over the flowers because they are protected with wax.
The last step is to paint the melted wax all over the backgound and then wad up the entire painting - the scary part - to crack the wax. Then you smooth it out and paint a dark color over the entire piece - this will settle in the cracks to give that authentic 'batik look'. As you can see below, it looks like a mess - at this point you just have to trust the process.
Using newspaper you iron off all of the wax and you are done. It is always a surprise to see the beautiful and unique end result of this process - enjoy!

I shared this with Paint Party Friday - check out the other artists!

A Rose Is A Rose

YELLOW ROSE
Original Watercolor - 8x10

Last week when I announced to my students that we would be painting roses they did not even try to quiet their moans and groans. Roses are such a perfect flower that they can be challenging to paint but with practice and an open mind you will learn enjoy the process and be happy with your results - I promise!

I began with a light sketch of the rose and then wet the whole piece of paper. Keeping in mind that I wanted a light colored rose, I laid in my colors of pale yellow and light blue. I added a little bit of peach in the flower area and then some green where I wanted the leaves to be. To loosen things up a bit I spattered some paint. Notice that some of the green crept into the flower because of the wet paper - no need to panic, this will just add a cohesive look to the painting.

After everything is dry, I just took a petal at a time and painted in the shadow areas of the rose, building up the value a step at a time. Be sure you let each layer dry before painting on top - this will keep your colors clear and pure.

I shared this with Paint Party Friday and Artists in Blogland!

Tropical Island

TROPICAL BLOOM
Original Watercolor - 11x15
$70 - Buy Here

My brother is lucky enough to live in Hawaii on the island of Kauai. We have taken the kids over several times for a visit and it truly is paradise. Tropical weather, wonderful beaches and of course beautiful flowers blooming everywhere.


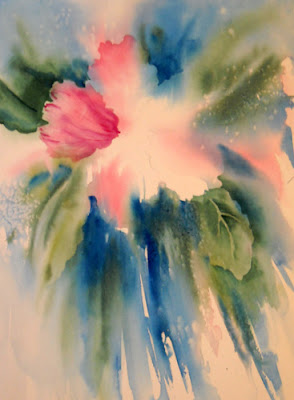
I began this painting as a class demo and wanted to show my students how to create a vignette by letting the paint run off the bottom of the paper. A vignette is when you don't paint everything in but leave some white paper to create a light, loose look in your composion. You can also see where I begain to use negative painting to start defining the petals of the hibiscus and some of the leaves.

Doesn't it make you wish you were on a topical island somewhere?

CACTUS IN BLOOM - Watercolor Collage

The process for this Cactus Watercolor Collage is similar to the workshop I taught with the tulips. On 300# watercolor paper I lightly sketched the cactus shapes and where I wanted the flower blooms. Then I wet the paper and painted in some of the colors just to give me a starting point.
After the paint dried I started collaging on some papers for the flowers. I used some tissue papers that I bought - some solid pinks and some with designs on them. I wasn't sure I was happy with the design of the cactus - might need to change it at the bottom.
You can tell that I did change the design some - made the cactus in the front left more dominant. Started gluing on green papers - mostly tissue. The dark green was a heavier tissue paper with gold flecks (the mettalic doesn't photograph very well) that I used for shadows. Added more collage to the flowers and  came in with more watercolor paint around the cactus and blooms for definition.
I continued adding papers, gradually building up texture and using some heavier rice papers. Painted more in the background and on the flowers. Added more collage... and so on until I felt like it was done - sometimes the hardest part is knowing when to stop!

Cactus in Bloom- SOLD - 11x15 inches original watercolor collage.

Watercolor Collage Workshop - Tulips

I taught a Watercolor Collage workshop yesterday and we had a great day - lots of fun and creativity!
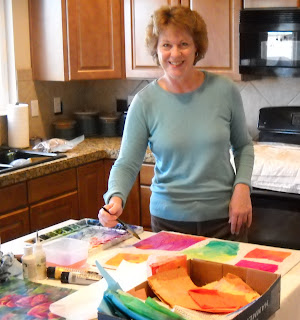
Here I am painting white tissue paper and rice papers with watercolor - the first step.
After they dry they will be used as collage pieces.
Then I lightly sketched some tulips and leaves and painted wet on wet the basic colors I wanted in the painting. For the demo I decided to work vertically and use more yellow than the original piece.
Here I have started gluing on (using matte medium) some of the tissue paper that I painted and some that is already decorative (store bought). I tear shapes instead of using scissors to keep it more organic. I am concentrating on the tulip shapes and some of the leaves. I put some of the pink swirl tissue in the back ground around the leaves to carry the pink thru the composition.
After I collaged on the tissue I went in with watercolor and painted around some of the tulips and defined some leaves. Then I returned to collage adding more colored tissue and some decorative rice paper in to the background. I decided there was too much space at the bottom so I cropped it to make it a square. I love the spring colors and all of the movement but feel that it is a little too busy. I will live with it for a few days and then go back in with paint and maybe some more collage to add a few darks.

The original Tulip Watercolor Collage can be found for sale on Etsy - $60 - 11x15 inches Click Here

ROSES - Watercolor

Yesterday I was lucky enough to spend the afternoon painting with my art buddies. My goal was to finish up some paintings that I had started a while ago.
This is what I started with - I had previously painted the initial wet on wet and then begun to use negative painting to create the roses. I did not draw anything to begin with.

This is the final painting. I refined the flower shapes, added shading on the petals, darkened the centers, negatively painted leaf shapes and added the stems. All in all a great day!

GRAPES & LEAVES - Final Step

This is the finished painting. I continued to refine and shade shapes as needed. I reinforced darks in the back ground to create a path to carry the eye thru the composition. Think of a ribbon flowing thru the painting.

GRAPES & LEAVES - Step 3

I have started to come in and negative paint around some of the grape shapes, shade between the grapes and add new shapes if needed for the composition. I have created some new leaves by painting around them and started to shade and add detail to some of the leaves.

GRAPES & LEAVES - Step 2

This shows the painting after the paper was dry and the wax paper, leaves and cheese cloth were removed.
You can see the great texture left by the leaves and the grape shapes

GRAPES & LEAVES - Step 1

I gave a workshop last month where we painted grapes and leaves using several fun texturing techniques.
The first step was to wet the paper (you can wet both sides to keep it from drying so quickly as you work) and paint wet on wet the colors you want for the grapes and the leaves. Have a general idea of composition and placement when you do this. While the paint is still wet place grape shapes cut from wax paper in the areas that you want the grapes. As you place several shapes you can add more dark paint around them and then place more down (adds depth). using real leaves paint several colors on the back side (where the veins are) and then place them on the wet paper, press thyem down and leave them in place. You can also use strands from cheese cloth to put on the paper (add more paint on top if needed) to suggest the vine tendrils seen with grapes.
If your paint/paper starts to dry on you just spray it with a fine mist of water. You have to work quickly at this stage so be sure you pre cut enough grape shapes and have your leaves and cheesecloth ready to go.
Leave everything in place and let the paper dry completely.